# Create Multiple Risk Registers
Multiple Risk Registers in Sprinto let you segment and manage risks across different business units, regions, frameworks, or operational contexts—without mixing unrelated risks into a single register. Each risk register functions independently, with its own set of risks, metrics, and views, while retaining the same core risk management workflows you already use in Sprinto.
This capability is useful when different teams or geographies require separate ownership, reporting, or analysis of risks, but still need a consistent and auditable risk management experience.
{% hint style="info" %}
#### **Note**
Multiple Risk Registers is an **Enterprise-only feature**. It is available exclusively on Sprinto’s Enterprise plan and is designed for organisations that need to manage risks across multiple business units, geographies, frameworks, or regulatory scopes within a single Sprinto account.
{% endhint %}
***
### Key features
* Create and maintain multiple risk registers from a single Risks workspace.
* View high-level risk metrics for each register, including inherent risk, residual risk, effective residual risk, and treatment effectiveness.
* Rename or delete risk registers as organisational needs evolve.
* Manage risks within each register independently, without affecting other registers.
* Use existing workflows inside a register, such as adding risks, periodic risk assessments, and configuration, without any changes to the current risk flow.
***
### Procedure
#### Create a new risk register
1. Log in to the Sprinto dashboard.
2. Navigate to **Risks** from the left navigation menu.
3. On the **Overview** tab, click **Create risk register** in the top-right corner.
4. In the **Create risk register** dialog, enter a name for the risk register.
5. Click **Create risk register**.
The new risk register is added to the Risks overview and appears alongside your existing registers.
***
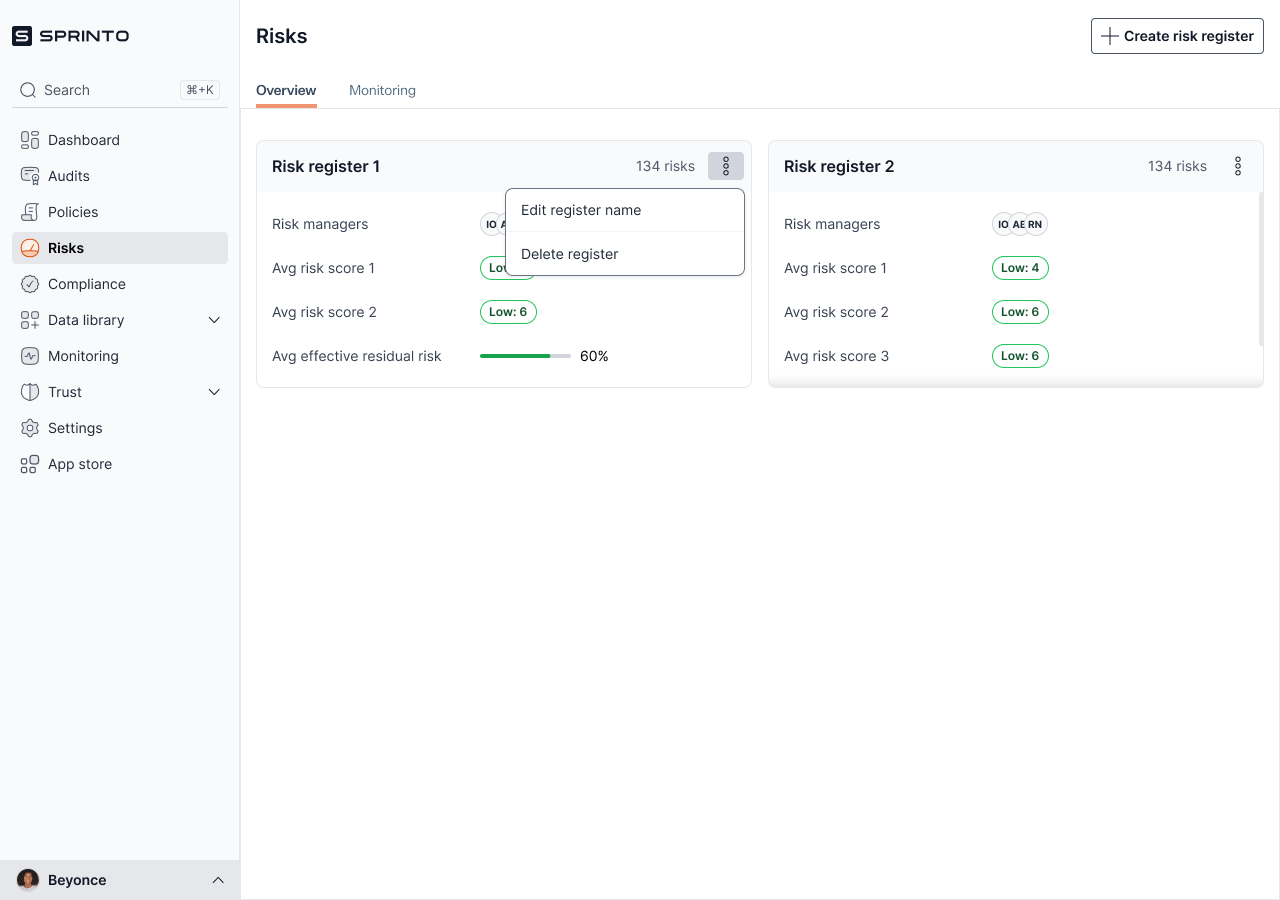
#### Edit a risk register name
1. From the **Risks** overview, locate the risk register you want to update.
2. Click the three-dot menu next to the risk register.
3. Select **Edit register name**.
4. Enter the updated name.
5. Click **Save changes**.
The updated name is reflected immediately across the Risks section.
***
#### Delete a risk register
1. From the **Risks** overview, click the three-dot menu next to the risk register.
2. Select **Delete register**.
3. Review the confirmation message.
4. Click **Delete** to confirm.
{% hint style="warning" %}
#### **Warning**
Deleting a risk register permanently removes all risks in that register and cannot be undone. Sprinto recommends downloading or exporting the risk register before deletion if you need a reference.
{% endhint %}
***
#### Access and manage risks within a register
1. Click on a risk register from the **Risks** overview.
2. You are taken into the selected register, where you can:
* Add and manage risks
* Perform periodic risk assessments
* Configure register-level settings
These workflows remain unchanged from the existing risk management experience.
***
### Risk register status indicators
Each risk register displays summary metrics to help you quickly assess its overall posture:
* **Average inherent risk**: The average risk score before controls are applied.
* **Average residual risk**: The average risk score after controls are applied.
* **Average effective residual risk**: The adjusted residual risk based on control effectiveness.
* **Average treatment effectiveness**: A percentage indicating how effective current treatments are across risks in the register.
These indicators are calculated independently for each register.
***
### Key notes
* You can create multiple risk registers, but each register is managed independently.
* Deleting a risk register permanently deletes all associated risks.
* Risk workflows inside a register (adding risks, assessments, configuration) behave the same as in the single-register setup.
* Metrics shown on the Risks overview are calculated per register and do not roll up across registers by default.